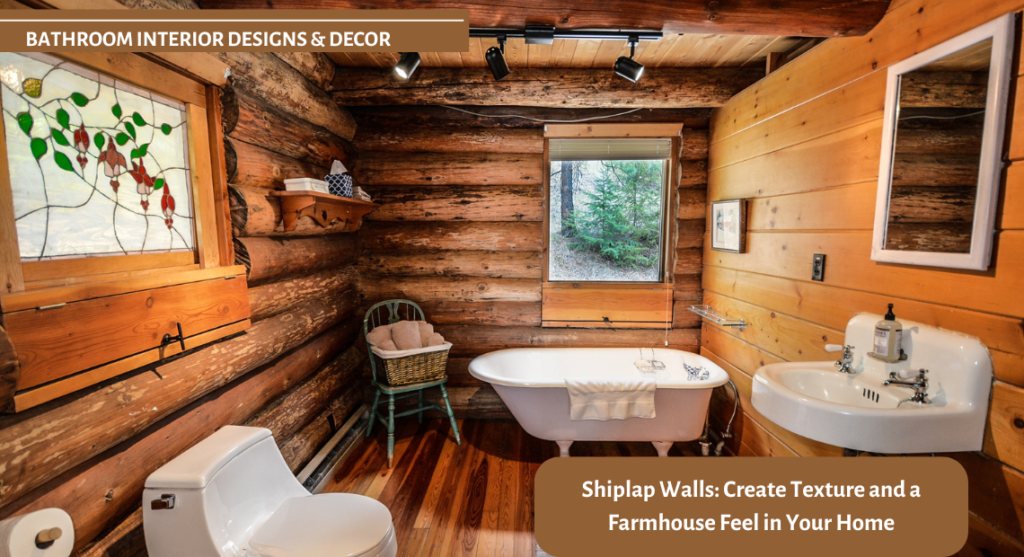
If you’re dreaming of a cozy, inviting home that captures the essence of rustic charm, shiplap walls might just be the perfect design element for you. Once a staple in barns and coastal homes, shiplap has surged in popularity in recent years, bringing its unique texture and farmhouse appeal to modern interiors. Let’s explore what makes shiplap such a beloved choice and how you can incorporate it into your own space.
What is Shiplap?
Shiplap refers to wooden boards that are milled to create a uniform, overlapping joint. Traditionally used in the construction of barns, sheds, and homes, these boards were designed for durability and weather resistance. Today, shiplap has transcended its utilitarian roots to become a trendy design feature in homes across the country.
The Allure of Shiplap
- Texture Galore: One of the most compelling reasons to choose shiplap is the texture it adds to a space. Unlike flat paint or wallpaper, shiplap introduces depth and interest, drawing the eye and creating a warm, inviting atmosphere. Whether painted in soft whites, muted grays, or left in their natural wood tones, shiplap brings a tactile quality that elevates the aesthetic of any room.
- Versatile Style: Shiplap effortlessly blends with various design styles. While it’s most commonly associated with farmhouse décor, it can also complement coastal, industrial, and even modern designs. This versatility makes it a fantastic choice for living rooms, bedrooms, and even bathrooms.
- Timeless Appeal: The farmhouse aesthetic never goes out of style. Shiplap evokes feelings of nostalgia and comfort, making it an ideal choice for creating a home that feels both timeless and inviting. Incorporating shiplap can transform a sterile space into a warm retreat.
How to Incorporate Shiplap into Your Home
1. Feature Walls
- Living Room: A shiplap feature wall can serve as the room’s focal point. Consider painting it in a contrasting color—like a deep navy or muted sage—against lighter walls for a bold statement. You could also decorate with artwork or mirrors to enhance the visual impact.
- Bedroom: Install shiplap behind the bed to create a stylish headboard effect. Use light, soft colors to promote relaxation, or choose a distressed finish for a more rustic appeal. Accent with decorative pillows and bedding that complement the shiplap’s tones.
2. Ceilings
- Adding shiplap to the ceiling can dramatically change a room’s atmosphere. Opt for a horizontal installation to draw the eye across the room, or vertical boards to give the illusion of height. A whitewashed finish can brighten dark spaces, while darker wood tones add warmth to high-ceiling areas.
3. Accent Walls in Hallways
- Shiplap can turn a bland hallway into a charming passage. Consider a half-wall installation with wainscoting on the lower half and painted walls above. This approach adds interest without overwhelming narrow spaces. You might also incorporate sconces or artwork to further enhance the look.
4. Wainscoting
- Using shiplap as wainscoting provides a classic, upscale appearance. It’s perfect for dining rooms or formal entryways. Paint it a crisp white or soft color to contrast with darker wall paint, creating an elegant transition. Don’t forget to add a chair rail to finish off the look!
5. Fireplace Surrounds
- Framing a fireplace with shiplap can enhance its presence in the room. Choose a white or light wood finish to make the fireplace stand out, or a darker stain for a dramatic effect. Consider adding built-in shelves on either side to display decorative items, books, or plants.
6. Bathroom Accents
- In bathrooms, shiplap can create a spa-like ambiance. Use moisture-resistant materials or paint it with waterproof sealant. Shiplap on lower walls can be an excellent way to protect against water splashes, while soft, calming colors like pale blues or greens can enhance relaxation.
7. Kitchen Backsplashes
- Shiplap backsplashes can bring warmth and texture to your kitchen. For a cohesive look, pair it with wooden open shelves for displaying dishware or plants. Use a heat-resistant sealant if you place it near cooking areas. Choose a color that complements your cabinetry, or opt for a whitewashed look for a fresh feel.
8. Furniture Accents
- Create custom furniture pieces using shiplap, such as a coffee table with a shiplap top or a side table with shiplap drawer fronts. This allows you to integrate the shiplap aesthetic without a major commitment. Stain or paint the furniture to match your existing décor for a cohesive look.
9. Mix with Other Materials
- Pairing shiplap with materials like brick or metal can create a beautiful contrast. For instance, use shiplap on one wall and a brick accent on another to add depth. Metal accents, like industrial light fixtures or hardware, can also complement the rustic charm of shiplap.
10. DIY Projects
- If you’re handy, consider smaller DIY shiplap projects. Make custom picture frames using shiplap boards, or create decorative wall shelves. Even small touches, like a shiplap-covered bulletin board, can bring that farmhouse charm into your home without the need for larger installations.
11. Color Coordination
- When choosing colors for your shiplap, consider the existing palette of your space. Lighter colors can help to open up small areas, while darker colors create a cozy, intimate feeling. Think about the overall mood you want to convey and select colors that harmonize with your décor.
12. Artistic Touches
- Frame your favorite artwork or family photos with shiplap for a cohesive design element. This can tie together your décor while allowing you to showcase personal touches. Arrange multiple frames in a gallery wall style for a modern twist on classic shiplap charm.
DIY Shiplap walls for bathroom
Creating DIY shiplap walls in your bathroom can add a charming, rustic touch while enhancing the overall aesthetic. Here’s a step-by-step guide to help you through the process:
Materials Needed
- Shiplap boards: You can buy pre-made shiplap boards or use plywood or MDF boards cut into strips.
- Construction adhesive: For extra hold.
- Nails or screws: To secure the boards in place.
- Stud finder: To locate wall studs.
- Level: To ensure your boards are straight.
- Measuring tape: For accurate measurements.
- Miter saw or circular saw: For cutting boards.
- Paint or stain: For finishing.
- Caulk: For filling gaps.
- Sanding block: For smoothing edges.
- Paintbrush or roller: For applying paint or stain.
Step-by-Step Guide
1. Prepare the Space
- Remove any existing wall coverings, such as wallpaper or old paint. Ensure the surface is clean and dry.
- Check for any plumbing or electrical fixtures on the wall, and plan your installation around them.
2. Measure and Plan
- Use a measuring tape to determine the height and width of the wall where you’ll install the shiplap.
- Decide how you want the shiplap to run (horizontally or vertically). Horizontal shiplap is more common in bathrooms.
3. Choose Your Boards
- Select the type of shiplap you want. If using plywood, you can cut it into strips (commonly 6-8 inches wide).
- Consider the wood’s finish—whether to leave it natural, paint it, or stain it.
4. Cut the Boards
- Use a miter saw or circular saw to cut your boards to the desired lengths. Make sure to account for any outlets or switches.
5. Locate the Studs
- Use a stud finder to locate the wall studs. Mark these spots lightly with a pencil, as you’ll want to secure the boards to the studs for stability.
6. Install the Bottom Board
- Start with the bottom board, placing it against the wall at your desired height. Use a level to ensure it’s straight.
- Secure it in place with construction adhesive and nails or screws into the studs.
7. Continue Adding Boards
- Place the next board above the first, ensuring the groove fits over the tongue of the bottom board. Repeat this process, checking each board with a level as you go.
- If necessary, cut the final board to fit at the top.
8. Fill Gaps and Holes
- Once all boards are installed, use caulk to fill any gaps between boards and around edges. This will provide a cleaner look.
- Fill nail holes with wood filler, allowing it to dry before sanding smooth.
9. Finish the Surface
- Sand any rough edges and surfaces to ensure a smooth finish.
- Apply your chosen paint or stain, allowing adequate drying time between coats. For a bathroom, consider a water-resistant paint or sealant.
10. Final Touches
- Reinstall any fixtures or accessories that were removed, and style your bathroom with decor that complements your new shiplap walls.
Tips for Success
- Ventilation: Make sure your bathroom is well-ventilated, especially during the painting or staining process.
- Water Resistance: For added moisture protection, consider using a sealant over the paint or stain.
- Lighting: Install proper lighting to highlight the texture of the shiplap. Wall sconces or overhead fixtures can enhance the rustic charm.
Maintenance Matters
- One of the benefits of shiplap is its durability. However, if you choose to use natural wood, be mindful of the potential for moisture damage, especially in high-humidity areas like bathrooms or kitchens. Regularly check for signs of wear, and consider sealing or painting the wood to protect it from the elements.
Shiplap walls are more than just a trend; they’re a way to bring warmth, character, and a touch of nostalgia into your home. Whether you’re fully committing to a shiplap wall, adding accents, or exploring creative ceiling options, this timeless material has the potential to transform any space. So grab your tools, or call in a pro, and get ready to embrace the farmhouse charm that shiplap offers. Your home deserves a touch of that rustic elegance!


