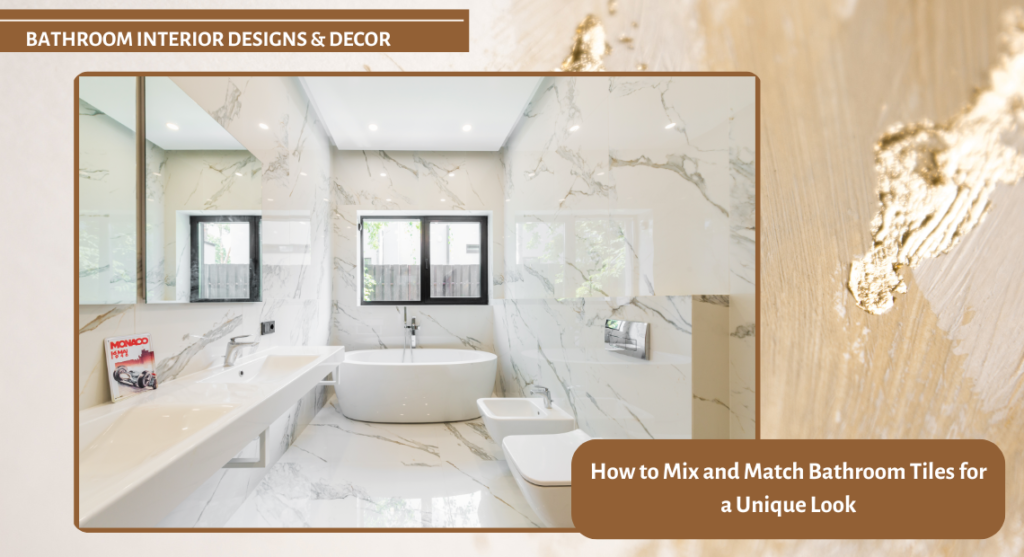
Transforming your bathroom into a stunning sanctuary can be as simple as playing with tiles. Mixing and matching tiles allows you to create a unique look that reflects your personal style, adds character, and enhances the overall aesthetic of your space. Here’s a guide on how to effectively mix and match bathroom tiles for a striking result.
1. Choose a Cohesive Color Palette
Creating a cohesive color palette is crucial when mixing and matching bathroom tiles, as it helps tie your design together and ensures a harmonious aesthetic. Here are some steps and tips to help you choose the perfect color palette for your bathroom tiles:
1. Define Your Style
- Before selecting colors, think about the overall style you want to achieve. Are you aiming for a modern, minimalist look, a cozy farmhouse vibe, or a vibrant bohemian aesthetic? Your style will guide your color choices and help you narrow down your options.
2. Start with a Base Color
- Choose a neutral base color that will serve as the foundation for your palette. This could be a classic white, soft beige, or cool gray. A neutral base allows for versatility and creates a calm backdrop for bolder accent tiles.
3. Add Accent Colors
Once you have your base color, introduce one or two accent colors. These should complement the base and work well together. For example:
- Ocean-inspired Palette: Pair a soft aqua base with deeper blues and sandy beige for a coastal feel.
- Earthy Tones: Use a warm taupe base with rich greens and terracotta for a natural, grounded look.
- Bold and Bright: Choose a crisp white base and add vibrant hues like coral or teal for a lively, modern vibe.
4. Consider Tile Textures and Finishes
- Textures and finishes can affect how colors are perceived. Glossy tiles reflect light and can brighten a space, while matte tiles offer a more subdued, sophisticated look. Mixing textures can add depth to your design, so consider how different finishes interact with your chosen colors.
5. Use Color Samples
- Before committing to a color palette, gather samples of your chosen tiles. Lay them out together to see how they work in different lighting conditions. This step is crucial, as natural light can significantly affect how colors appear in your space.
6. Incorporate Grout Color
- Don’t forget about the grout! The color of your grout can either blend with the tiles for a seamless look or contrast for added definition. For example, using a white or light gray grout with darker tiles can create a striking effect, while a matching grout can enhance the cohesion of your color palette.
7. Balance Warm and Cool Tones
- If your palette includes both warm and cool tones, ensure they are balanced. For instance, if you choose warm earthy colors, add cooler hues for contrast and vice versa. This balance can prevent any one color from overwhelming the space.
8. Personal Touches
- Finally, add a personal touch to your color palette by incorporating your favorite shades. Whether it’s a specific hue that evokes a fond memory or a color that inspires calm, making your palette personal will make the space feel uniquely yours.
2. Combine Different Patterns
Mixing and matching tile patterns is an exciting way to create a unique and visually appealing bathroom. When done thoughtfully, different patterns can add depth, personality, and style to your space. Here’s how to effectively combine various patterns for a stunning bathroom design.
1. Establish a Focal Point
- Begin by selecting one tile pattern to serve as the focal point of the bathroom. This could be a bold, eye-catching design, like a patterned floor tile or a vibrant accent wall. From there, choose complementary patterns that enhance, rather than compete with, your focal point.
2. Limit the Number of Patterns
- To avoid a chaotic look, limit yourself to two or three different tile patterns. This allows for enough variety to create interest without overwhelming the space. For instance, you might pair a geometric floor tile with simple, solid-colored wall tiles and a textured accent tile in the shower.
3. Mix Different Shapes and Sizes
- Combining different shapes and sizes of tiles can create a dynamic visual effect. For example, use large rectangular tiles for the floor and smaller square tiles for the shower wall. This contrast in scale adds depth and dimension, making the space feel more layered and inviting.
4. Create Rhythm with Repetition
- To create harmony, use repeated patterns in different areas of the bathroom. For example, if you choose a floral pattern for the backsplash, consider using smaller floral tiles as accents in the shower niche or on shelves. This repetition helps tie the design together.
5. Pair Bold with Subtle
- Mix bold, intricate patterns with subtle, solid colors to balance the overall look. For instance, if you opt for a vibrant mosaic tile, complement it with neutral, plain tiles that allow the mosaic to shine without overwhelming the senses.
6. Use a Unifying Color Scheme
- Ensure that all the patterns you choose share a cohesive color palette. This unification helps to blend the different patterns seamlessly. For instance, if your focal tile is a navy geometric pattern, select additional tiles in varying shades of blue or complementary colors to maintain visual cohesion.
7. Incorporate Textured Tiles
- Textured tiles can add an extra layer of interest when mixed with patterns. Consider combining a smooth patterned tile with a textured one to create contrast. For example, a glossy patterned tile on the walls can be paired with a matte textured floor tile for a beautiful balance.
8. Use Patterns Strategically
- Think about how different patterns will flow throughout the space. You can use more intricate patterns in less prominent areas and reserve simpler designs for larger spaces. For example, intricate tiles can be used around the sink area, while larger, plainer tiles can dominate the floor.
9. Consider the Grout Color
- The grout color can also play a significant role in how patterns are perceived. A contrasting grout color can highlight the individual tiles and patterns, while a matching grout can create a more seamless look. Experiment with different grout colors to see how they enhance or alter the visual impact of your mixed patterns.
10. Play with Orientation
- Don’t be afraid to change the orientation of your tiles to add interest. Laying tiles in a herringbone pattern alongside traditional grid patterns can create dynamic visual effects. Experimenting with layout can completely transform the feel of your bathroom.
3. Vary the Sizes
Mixing tile sizes in your bathroom design can add a dynamic and visually engaging element to the space. By thoughtfully combining different sizes, you can create a unique look that enhances the overall aesthetic and functionality of your bathroom. Here are some tips on how to effectively vary tile sizes for a stunning result.
1. Create a Visual Hierarchy
- Start by determining which size will be your primary tile. For example, you might use large-format tiles on the floor to create a spacious feel while opting for smaller tiles as accents on the walls or in the shower. This creates a visual hierarchy that draws the eye and adds interest.
2. Play with Scale
- Using a mix of small and large tiles allows you to play with scale, adding depth and dimension to the space. For instance, pairing oversized rectangular tiles with tiny mosaic tiles creates a beautiful contrast. This approach can make the room feel larger while providing texture and detail.
3. Focus on Functionality
- Consider the function of different areas in your bathroom when choosing tile sizes. Larger tiles work well on the floor, where fewer grout lines can create an uninterrupted look, while smaller tiles are perfect for intricate areas like shower niches or backsplashes, where detail is important.
4. Use Accent Borders
- Incorporate smaller tiles as an accent border around larger tiles to add visual interest. For example, a border of decorative mosaic tiles can frame a larger, plain tile, providing a striking contrast that highlights both tile types.
5. Experiment with Layout
- Varying the layout of different-sized tiles can also enhance your design. Consider laying larger tiles in a grid pattern while arranging smaller tiles in a herringbone or diagonal pattern. This adds movement to the space and can create a more dynamic visual flow.
6. Highlight Key Areas
- Use smaller tiles to highlight specific areas, such as a shower floor or a feature wall. This draws attention to those spots while keeping the rest of the space more open with larger tiles, creating a sense of balance.
7. Combine Textures with Size
- Mixing tile sizes also allows for the incorporation of different textures. For example, you might pair smooth, large tiles with smaller, textured tiles. This combination not only adds visual interest but also enhances the tactile experience of your bathroom.
8. Maintain a Cohesive Color Scheme
- When varying tile sizes, ensure that all tiles share a cohesive color palette. This helps unify the different elements and prevents the design from feeling chaotic. Choose complementary colors that enhance your overall theme, whether it’s soft pastels or bold, rich hues.
9. Consider the Grout Lines
- Be mindful of how grout lines will look when mixing tile sizes. Larger tiles typically have fewer grout lines, which can make a space appear larger and cleaner, while smaller tiles create more lines that can add texture and detail. Experiment with grout colors to see how they affect the overall look.
10. Incorporate Personal Style
- Finally, let your personal style shine through in your tile selections. Whether you prefer modern, minimalist designs or eclectic bohemian patterns, varying sizes can help express your unique taste. Don’t be afraid to mix it up—after all, your bathroom should reflect who you are!
4. Incorporate Texture
Incorporating texture into your bathroom tile design can elevate the space, adding depth and interest beyond mere color and pattern. Textured tiles can create a stunning visual and tactile experience, making your bathroom feel more inviting and dynamic. Here’s how to effectively mix and match tiles with different textures for a truly unique look.
1. Understand Texture Types
Before diving into design, familiarize yourself with the various types of tile textures:
- Glossy: Reflects light and adds a sleek, modern touch. Great for small spaces as they can make the area feel larger.
- Matte: Offers a more subdued, earthy feel. Ideal for creating a cozy, spa-like atmosphere.
- Textured: Includes relief designs, such as ridges or patterns, adding visual interest and tactile appeal.
2. Create Contrast
- Mixing textured tiles with smooth tiles can create a striking contrast that highlights both elements. For example, use glossy subway tiles for the walls paired with a matte, textured floor tile. This balance can enhance the aesthetic while ensuring safety and functionality.
3. Use Textured Accents
- Incorporate textured tiles as accents to draw attention to specific areas. For instance, a textured mosaic tile can be used as a feature wall in the shower, while larger, smoother tiles cover the rest of the space. This approach creates a focal point without overwhelming the room.
4. Experiment with Patterns
- Combining different textures with various patterns can create a rich visual experience. For example, pair a patterned tile with a solid textured tile. The pattern can create movement, while the texture adds depth, making the bathroom feel layered and inviting.
5. Incorporate Natural Elements
- Consider using natural stone tiles, which inherently have unique textures. The irregularities in stone can add a rustic charm to your bathroom. Pair these with smooth, polished tiles to create a contrast that showcases the beauty of both materials.
6. Layer Textures
- Layering textures can create a cozy and dynamic environment. For instance, combine smooth floor tiles with a textured backsplash in the vanity area. This layering technique adds complexity to your design and makes the space feel more cohesive.
7. Utilize Grout for Added Texture
- Don’t overlook the grout! The color and width of your grout lines can influence the overall texture of your tile layout. Consider using a contrasting grout color with textured tiles to accentuate their features, or a matching color to create a seamless look.
8. Incorporate Wall Treatments
- Beyond just floor and wall tiles, consider adding textured wall treatments, such as wainscoting or shiplap, alongside your tiles. This combination can create a more integrated design while introducing additional texture to the space.
9. Choose a Focal Point with Texture
- Designate a specific area, like the shower or behind the vanity, as a focal point by using a unique textured tile. This can create a visual anchor in your bathroom while allowing the rest of the design to be more subdued.
10. Let Your Personal Style Shine
- Ultimately, the textures you choose should reflect your personal style. Whether you prefer sleek modern finishes or rustic natural stones, incorporating a variety of textures allows you to express yourself in your bathroom design.
5. Create a Focal Point
Establishing a focal point in your bathroom is a powerful way to make a statement and enhance the overall design. By thoughtfully mixing and matching tiles around a central feature, you can create a visually captivating space that draws the eye and adds character. Here’s how to effectively create a focal point using tiles in your bathroom design.
1. Choose Your Focal Point
Start by selecting the area you want to highlight. Common focal points in bathrooms include:
- Shower Wall: An accent wall within the shower can serve as a stunning visual centerpiece.
- Vanity Area: The wall behind the vanity or the backsplash can be a great spot to showcase tile design.
- Freestanding Tub: If you have a standalone tub, consider the wall behind it as a potential focal point.
2. Select Bold Tiles
- Once you’ve chosen your focal point, select tiles that are bold and eye-catching. This could be a vibrant patterned tile, a unique texture, or an unexpected color. For example, a striking geometric tile can create a modern look, while a colorful mosaic can evoke a more eclectic style.
3. Contrast with Surrounding Tiles
- To make your focal point stand out even more, use contrasting tiles around it. For instance, if your focal point features colorful patterned tiles, consider using neutral or muted tones in the surrounding areas. This contrast will draw attention to the focal point and enhance its impact.
4. Incorporate Different Patterns
- Mixing patterns can also add depth to your focal point. You might pair a bold patterned tile with simpler, complementary tiles. For example, if your focal wall is adorned with a vibrant floral tile, surrounding it with solid-colored tiles can provide a clean backdrop that enhances the floral design.
5. Use Size Variations
- Varying tile sizes can create visual interest and emphasize your focal point. Consider using larger tiles on the floor or surrounding walls and smaller, intricate tiles as accents in the focal area. This combination can create a dynamic effect that draws the eye.
6. Frame Your Focal Point
- Creating a visual frame around your focal point can further highlight it. This can be achieved with borders or contrasting grout colors. For example, using a contrasting tile border around a vibrant shower wall can enhance its prominence and create a finished look.
7. Incorporate Lighting
- Strategically placed lighting can significantly enhance your focal point. Consider installing sconces, backlighting, or even LED strips around the tile feature to illuminate it. Good lighting not only highlights the tiles but also creates a warm, inviting atmosphere.
8. Add Decorative Elements
- Consider integrating decorative elements, such as shelves or artwork, into your focal area. These additions can complement your tile choice and further enhance the visual appeal of the space.
9. Maintain a Cohesive Color Palette
- While your focal point should stand out, it’s important to maintain a cohesive color palette throughout the bathroom. Ensure that the colors in your focal tiles harmonize with the surrounding tiles and décor. This balance will create a unified look that feels intentional.
10. Let Your Personality Shine
- Ultimately, your focal point should reflect your personal style. Choose tiles that resonate with you and express your aesthetic. Whether you prefer a sleek modern look or a more eclectic vibe, your focal area can showcase your unique taste.
6. Use Grout Strategically
Grout often plays a supporting role in tile design, but when used strategically, it can significantly enhance the overall aesthetic of your bathroom. Choosing the right grout color and width can highlight your tile choices and contribute to a cohesive and stylish look. Here’s how to effectively use grout to mix and match bathroom tiles for a unique design.
1. Choose the Right Color
The color of your grout can dramatically affect how tiles appear:
- Contrasting Grout: A darker grout can create a bold contrast with light-colored tiles, making patterns stand out. For example, white subway tiles with black grout can give a classic, modern vibe.
- Matching Grout: Using a grout color that matches your tiles creates a seamless look. This technique is especially effective with larger tiles, as it reduces the visual impact of grout lines and allows the tile design to take center stage.
- Complementary Grout: Selecting a grout color that complements your tile palette can enhance cohesion. For example, a soft gray grout can work well with both light and dark tiles, bridging different colors in your design.
2. Vary Grout Widths
The width of grout lines can also impact the overall look:
- Narrow Grout Lines: Opting for narrower grout lines (1/16 inch) can create a sleek, modern appearance and make the tiles feel like a continuous surface. This works well with large-format tiles.
- Wider Grout Lines: Wider grout lines (1/8 inch or more) can add texture and define each tile more distinctly. This approach is especially effective with smaller tiles or mosaic designs, as it highlights the intricate patterns.
3. Incorporate Decorative Grout
- Consider using decorative or colored grout in specific areas to create interest. For example, if you have a mosaic tile accent wall, using a grout color that echoes one of the mosaic hues can tie the design together and create a cohesive look.
4. Highlight Patterns and Textures
- Using contrasting grout strategically can emphasize patterns and textures in your tile design. For example, if you have a textured tile, a contrasting grout can draw attention to its surface and enhance the tactile experience. Conversely, a matching grout can create a more subtle, seamless appearance.
5. Frame Your Focal Point
- You can use grout to create a framing effect around a focal point. For instance, if you have a striking tile feature, consider using a contrasting grout color around it to draw attention and enhance its prominence within the space.
6. Connect Different Tile Styles
- When mixing and matching different tile styles, grout can serve as a unifying element. Choose a grout color that appears in multiple tile patterns, creating a cohesive look throughout the bathroom and allowing diverse styles to harmonize.
7. Experiment with Grout Texture
- While most grout is smooth, some brands offer textured options. Textured grout can add a unique twist, especially in spaces with patterned tiles. Experimenting with grout texture can create depth and interest, making your tile design more dynamic.
8. Maintain Clean Lines
- Using consistent grout colors and widths can help maintain clean lines throughout your bathroom. This clarity will enhance the overall design and prevent the space from feeling cluttered or chaotic.
9. Consider the Overall Design Theme
- Make sure your grout choice aligns with your overall design theme. For a modern look, consider sleek, narrow grout lines with a contrasting color. For a rustic, farmhouse style, wider, textured grout can enhance the warmth of the space.
10. Test Before You Commit
- Before finalizing your grout choice, test a few colors and widths with your tile selections. Lay out a few tiles and apply grout samples to see how they work together. Lighting can affect the perception of color, so be sure to check them in different light conditions.
7. Test Layouts Before Committing
When it comes to mixing and matching bathroom tiles, envisioning your design can be exciting—but committing to a layout without testing it first can lead to unexpected outcomes. By experimenting with various tile arrangements, you can ensure that your final design is cohesive and visually appealing. Here’s how to effectively test layouts before making a commitment.
1. Gather Samples
- Start by collecting tile samples of the materials you’re considering. This allows you to see how different colors, patterns, and textures interact with one another. Bring home samples of at least three or four tile options to create a more versatile palette.
2. Create a Mock Layout
- Using your tile samples, lay out different configurations on a flat surface, like a large table or the floor. This allows you to visualize how the tiles work together without the commitment of installation. Experiment with various arrangements to see what resonates with your style.
3. Use Design Software
- If you prefer a more digital approach, consider using design software or apps that allow you to create virtual layouts. Many platforms let you upload images of your chosen tiles and arrange them in a digital space, giving you a clear visual before you begin the physical installation.
4. Consider Scale and Proportion
- When testing your layouts, pay attention to scale and proportion. Large-format tiles can make a small space feel larger, while small mosaics can add intricate detail. Ensure the sizes of your chosen tiles work harmoniously together, balancing larger tiles with smaller accents effectively.
5. Evaluate Color Combinations
- As you mix and match tiles, evaluate how the colors interact with one another. Consider factors like lighting and existing bathroom fixtures. Hold tiles next to each other to see how they complement or contrast, ensuring that your final palette feels cohesive and intentional.
6. Check for Patterns and Textures
- When mixing different patterns and textures, observe how they look together. Some patterns can clash, while others can create stunning visual interest. Don’t hesitate to experiment until you find a combination that feels balanced and pleasing.
7. Incorporate Grout Samples
- Grout can significantly affect how tiles appear, so include grout samples in your testing. Try out different grout colors and widths alongside your tile arrangements. Notice how grout enhances or diminishes the visual impact of your tiles.
8. Live with Your Layout
- Once you’ve created a few promising layouts, live with them for a few days. Tape samples to the wall or floor and step back to see how they look in different lighting throughout the day. This will give you a better sense of how the tiles will feel in the completed space.
9. Seek Feedback
- Share your tile layouts with friends or family for a fresh perspective. Sometimes, an outside opinion can provide valuable insights or highlight aspects you may have overlooked.
10. Be Open to Adjustments
- Remember that the design process is fluid. Don’t hesitate to make adjustments based on your testing. If a particular layout isn’t resonating with you, try something new. The goal is to create a space that feels uniquely yours.
8. Incorporate Natural Elements
Bringing natural elements into your bathroom design not only adds beauty but also creates a calming and organic atmosphere. When mixing and matching tiles, incorporating materials inspired by nature can elevate your space and provide a unique look. Here’s how to effectively integrate natural elements into your bathroom tile design.
1. Choose Natural Stone Tiles
- Natural stone tiles, such as marble, granite, slate, or travertine, add an elegant and timeless quality to your bathroom. Consider using these stones as focal points—like in a shower surround or as a statement floor tile—while pairing them with complementary ceramic or porcelain tiles for a balanced look.
2. Incorporate Wood Accents
- Wood elements can introduce warmth and texture into your bathroom. While traditional wood isn’t suitable for wet areas, you can use wood-look tiles that mimic the appearance of real wood. Consider combining these with natural stone or glossy tiles for a beautiful contrast.
3. Utilize Earthy Color Palettes
- Select tiles in earthy tones that reflect natural landscapes—think soft greens, warm browns, sandy beiges, and cool grays. These colors create a serene environment and can be mixed and matched to create a cohesive look that feels grounded and inviting.
4. Add Plants as Natural Décor
- Incorporating greenery into your bathroom can enhance the natural feel. Consider placing potted plants on shelves or using hanging planters near windows. The vibrant greens will contrast beautifully with your tiles, adding life and color to the space.
5. Experiment with Textures
- Mixing tiles with different textures can evoke a sense of nature. For instance, combine smooth, polished tiles with rough, textured stone tiles. This interplay can create a dynamic visual experience, reminiscent of natural environments.
6. Use Pebble or Mosaic Tiles
- Pebble or mosaic tiles can evoke the feeling of a natural riverbed or beach. Consider using these tiles in the shower floor or as a backsplash. Their organic shapes and textures add a playful touch that can be beautifully complemented by larger, more structured tiles.
7. Incorporate Natural Patterns
- Tiles with natural patterns—such as those that mimic marble veining or stone textures—can add visual interest. Mix patterned tiles with solid colors to create a striking contrast while maintaining a cohesive, natural theme.
8. Consider Biophilic Design Principles
- Biophilic design focuses on creating a connection to nature. Incorporate natural light through large windows or skylights to enhance the natural feel of your tiles. Pair your tile choices with wood, stone, and other organic materials to create a harmonious environment.
9. Emphasize Flow with Natural Lines
- When arranging your tiles, consider how natural lines can guide the eye. Use larger tiles in a way that mimics the flow of water or the layout of natural landscapes. This approach helps create a serene atmosphere reminiscent of the outdoors.
10. Personalize with Natural Artwork
- Add artwork or décor made from natural materials—such as driftwood, stones, or botanical prints—to complement your tile choices. These elements can enhance the organic feel of your bathroom while tying your design together.
9. Stay True to Your Style
- Ultimately, the best combinations reflect your personal style. Whether you lean towards a bohemian look with colorful encaustic tiles or a minimalist aesthetic with sleek, neutral tones, trust your instincts. Your bathroom should be a reflection of you and a space where you feel comfortable and inspired.
Mixing and matching bathroom tiles opens up a world of creative possibilities. By following these tips, you can craft a unique, personalized look that enhances your bathroom’s charm. Remember to play around with colors, patterns, and textures until you find the combination that feels just right. With a little experimentation, your bathroom can become a stylish oasis that showcases your personality and design flair!